Will post my Austria trip photos soon. Will also make Wiener Apfelstrudel next week.
Back from Vacation
↧
↧
A little bit of Salzburg, Austria

If there is one person that I really love watching eating apple strudel that is Hans Landa (Christoph Waltz). Colonel Hans Landa nicknamed the Jew hunter in 2009 Quentin Tarantino film Inglourious Basterds.
I made this apple strudel (apfelstrudel) 2 weeks ago but still lazy to blog it. Anyway, here are a few pictures of Salzburg. I am still not done uploading though haha I am really, really lazy lately. Guess I need another vacation to recover from the Austria vacation lol.
(Click image for larger view)

Mozart? Haha he was standing outside Mozart's birthplace. Few coins to have a picture with him.
(below) Pieter and I at Mirabell Garden.

Mozart's residence in Salzburg. We also saw his apartment in Vienna, but we did not went inside as few visitors commented that it's just a waste of money to pay the entrance fee, because there is nothing much to see inside.

Mozart's birthplace.
The Mozart family lived on the third floor of the "Hagenauer House" at Getreidegasse 9 for twenty-six years, from 1747 to 1773. The celebrated composer, Wolfgang Amadeus Mozart, was born here on January 27, 1756. The building is named after the merchant and toy dealer, Johann Lorenz Hagenauer (1712-1792), who owned the building and was a friend of the Mozart family.

The Makartsteg is a bridge over the Salzach River in Salzburg′s city centre. It was named after the 19th century Historicist painter Hans Makart, who was born and raised in Salzburg.
Padlocks attached to the fence just below the railing.
A love lock or love padlock is a padlock which couples lock to a bridge, fence, gate, or similar public fixture to symbolize their love. Typically the couple's names or initials are inscribed on the padlock, and its key is thrown away to symbolise unbreakable love.

View from Hohensalzburg Fortress.

Houses inside Hohensalzburg Fortress.

Stop over before going to the ice cave

It was really tiring but the view was amazing.

Eisriesenwelt (German for "World of the Ice Giants") is a natural limestone ice cave located in Werfen, Austria, about 40 km south of Salzburg. The cave is inside the Hochkogel mountain in the Tennengebirge section of the Alps. It is the largest ice cave in the world, extending more than 42km.
Temperatures inside the cave are usually below freezing. Warm clothes and walking shoes are recommended and must be prepared for uphill walking! (20 minutes walk to the cable car and another 30 minutes walk to reach the entrance of the caves) In addition, there are 1400 steps in the caves, that must be mastered. Photography is not permitted once visitors are inside the cave.

↧
Banoffee Pie

Just thinking about it gives me the shiver. I do not know why I made this yesterday, I just woke up with banoffee pie in my head.
Good thing the condensed milk here in Holland is not super sweet like the ones in The Philippines.

2 cups digestive biscuit, crushed
6 tbsp melted butter
- Mix digestive biscuit and melted butter and press mixture into 9 inch bottom loose pie tin. Chill for about 30 minutes.
filling
2-3 ripe bananas (depend on the size)
50g butter
1/4 cup light brown sugar (I only used 1/8 cup)
1 can condensed milk
2 tbsp lemon juice
1 cup whipping cream
1 to 2 tbsp sugar
chocolate shavings or cocoa powder
- Melt butter and light brown sugar in a medium saucepan over low heat. Add condensed milk and cook, stirring constantly with a wooden spoon, for 6-8 minutes or until caramel thickens but still pourable (do not boil).
- Remove from heat and let cool slightly. Stir well then pour mixture over the digestive biscuit.
- Peel the bananas, thinly sliced them and toss with lemon juice (this will prevent the bananas from getting darkened). Lay them on the caramel, gently push the bananas into the caramel.
- Whip cream then gradually add the sugar. Whip until soft peak.
- Spread the whipped cream over the bananas and smooth the top using a spatula and place in the fridge to set.
- Add chocolate shavings or cocoa powder on top before serving.


Pieter hates banana but he didn't say no to this pie. It was delicious!
↧
Miniature Patisserie
I just want to share these photos with all of you. Yesterday I finally completed my dollhouse patisserie. All cakes and pastries are hand sculpted by me in 1:12 scale and made out of polymer clay.


Tarts and tartlets.

This macaron tower was one of my 1st projects.


Can you guess the flavors? :-D

I also made gingerbread house for Christmas decoration.


I'm still thinking of changing some of the whole cakes specially that ugly roll cake.


Eclairs

Religieuse....The pastry, whose name means "nun", is supposed to represent a nun in a habit.
I baked REAL cheesecake last week haha Bourbon Pumpkin Cheesecake.

↧
Tres Leches Cupcakes Part 2

Last weekend I made banoffee pie for my friend Tong and another 1 for Pieter. Pieter then asked me what is the name of the cupcakes I baked on our wedding day and he told me that he really wants to try them again...so here I am with my Tres leches cupcakes. I used the same tres leches recipe I made years ago, the condensed milk on top was additional idea while eating the banoffee pie.

1/2 cup flour
1/2 cup sugar
1/4 cup oil
1/8 tsp salt
1/3 cup evaporated milk
1/4 cup cream
1/3 cup condensed milk
3 eggs, seperated
whipped cream
- Preheat the oven to 160C.
- Line muffin pans with paper cups
- In a large bowl, beat egg yolks on high speed until thick. Gradually beat in sugar, salt and oil. Sift flour and gradually add to yolk mixture and mix well.
- In a small bowl with clean beaters, beat egg whites on medium speed until soft peaks form.
- Fold the whites into the yolk and flour mixture, careful not to deflate the batter.
- Pour the batter into the paper-lined muffin pans. Bake the cupcakes in a preheated oven for 18-20 minutes or until golden brown and when a cake tester inserted in the middle comes out clean.
- Combine the condensed milk, evaporated milk and cream.
- Once the cupcakes are done baking, using a cake tester or a skewer poke holes in them all the way to the bottom. Slowly pour milk over the cupcakes allowing milk to absorb into the cupcakes. Repeat twice or until the cupcakes looked swollen.
- Cover and refrigerate for 2 hours.
- Pipe whipped cream and make a ring on top of the cupcakes. Fill each rings with condensed milk.
condensed milk topping (optional)
25g butter
1/8 cup light brown sugar
1/2 can condensed milk
- Melt butter and light brown sugar in a medium saucepan over low heat. Add condensed milk and cook, stirring constantly with a wooden spoon, for 6-8 minutes or until caramel thickens but still pourable (do not boil). Let cool completely.

↧
↧
Miniature Ice Cream Shop

I am not busy in the kitchen lately so I managed to finish my miniature ice cream shop. Cookies, donuts, candies and ice cream are handmade by me out of polymer clay.

I decided to convert this candle box into a miniature ice cream shop. Worked like a charm.

I also made my very 1st cabinet (lavender one)


↧
Bibingka (Philippines Delicacy)

The Philippines is known for having the longest Christmas season in the world. The four months that end with the syllable –ber are considered Christmas months. Stores, malls, houses are starting to look like Christmas as early as September and the holiday season extends until Feast of the Epiphany or Three Kings which falls around January 6. My Dutch family find it weird, but hey its a Filipino tradition and indeed nothing beats "Paskong Pinoy" (Filipino Christmas).
Speaking of "Paskong Pinoy" bibingka is one of Philippines delicacy and is popular during Christmas season. It is made with rice flour, coconut milk, eggs and butter, for the topping grated coconut, cheese and salted eggs. Baked over hot coals (top and bottom) in a clay pot lined with banana leaf.
I missed those Filipino delicacy like puto bumbong and bibingka that is commonly sold along the streets or outside the church during "simbang gabi". So to feel the Paskong Pinoy spirit here in Holland I decided to make this bibingka. I made it with cake flour though, I have rice flour but the glutinous ones and I dont want the cake to have rubbery and chewy texture so I experimented with cake flour. If you have rice flour go ahead and use it. The taste was really delicious! The scent of burnt banana leaf brings back a lot of childhood memories. Puto bumbong will be next this week.

Bibingka is best serve warm.
bibingka - makes 1 (8 inch)
1 cup rice flour (I used cake flour)
1 tsp baking powder
1/8 tsp salt
2 eggs
1/2 cup sugar, more for the top of the cake
2/3 cup coconut milk
2 tbsp melted butter, more for the top of the cake
1 salted egg, sliced thinly
grated cheese
banana leaf
grated coconut
1 cup rice flour (I used cake flour)
1 tsp baking powder
1/8 tsp salt
2 eggs
1/2 cup sugar, more for the top of the cake
2/3 cup coconut milk
2 tbsp melted butter, more for the top of the cake
1 salted egg, sliced thinly
grated cheese
banana leaf
grated coconut
- Preheat oven to 180 C. Line 8 inch baking tin with banana leaf and brush it with butter.
- In a large bowl sift together flour, baking powder and salt. Stir in the sugar.
- In a seperate bowl, lightly beat the eggs, then beat in the coconut milk and melted butter. Make a well in the center of the dry ingredients and pour in the beaten liquid ingredients. Stir gently until just combined. Do not over mix.
- Pour the mixture onto prepared baking tin.
- Bake in the pre-heated oven for 10 minutes. After 10 minutes take the cake out of the oven, arrange slices of salted eggs and sprinkle with grated cheese on top. Continue baking for about 10 minutes. You can check the doneness by inserting a toothpick in the middle of the cake and if the toothpick comes out clean, the cake is done. Then I move the oven rack to the highest position in the oven and turned my oven setting into this symbol " \/\/\/\/ " and let the top of the cake brown a little. Laugh all you want but I don't know the broiling setting of my oven, I even doubt if it has one so I used the grilling setting. Once done take the bibingka out of the oven.
- Brush the cake with butter and sprinkle with sugar and grated coconut. Serve warm.


↧
Fruitcake

When you say fruitcake there is only one thing that comes into my mind: Christmas and give away. But not all people like fruitcake why? Well it's either the fruits or the alcohol in it that they don't like. Me? I love it! in fact the stronger the alcohol the better.
Last month I took a journey to fruitcake making but I got disappointed with the end result because it was too dry and bland to my liking. So I told Pieter to bring and share it with his colleagues, to my surprised they all liked it haha.
This new recipe is from Pook of daily delicious. Pook is really friendly and she answered all the questions I left in her facebook page. Her blog is full of delicious recipes and beautiful photos. This fruitcake is really, really delicious (believed me I licked the spatula and tried 1 small cupcake size haha) nutty, fruity and yes alcoholy. My friend will come over to Holland and I can't wait to share this fruitcake to her. For the recipe please visit Dailydelicious.

♫♪ It's the most wonderful time of the year♫♪

↧
Season's Greetings!

↧
↧
Sushi Bar Dollhouse
Hello everyone Happy new year! I am on a diet right now that is why I don't post new recipes. I still make foods though the one that I really enjoy and it's not fattening. I am talking about my new sushi bar dollhouse. ![:-D]()

This sushi bar measures 30 x 17 x 19 cm 1:24 scale to be exact. Small but it's too cute and besides I like working on small dollhouse now because it's easy to decorate and fill it with stuff.

Everything was included in the box: lamps, wallpaper, flooring, furnitures and even the plant all you have to do is assemble it patiently. The food display you see infront and other accessories (empty bowl, plates, glasses, wine) were big, the size is for 1:12 scale so I decided to make my own in 1:24 scale


I made glasses out of paper, chopsticks, shrimp tempura, pork tonkatsu, sushi platter and bowls out of polymer clay. The sushi platter size is 1 cm x 1.5 cm, sushi sizes are 2 to 3 mm. I know 1:24 scale is much smaller but I think I will stick to 2 to 3 mm. I will make more sushi and noodles.

My French sushi chef Colette, her size is perfect for this dollhouse. :-D


My hand to give you an idea about the size.

↧
Pistachio and Speculoos Cheesecakes


↧
Vacation In The Netherlands
My younger sister is in The Netherlands right now. She will stay for 3 months...meaning Pieter and I will be eating lots of rice haha. Her interest is also baking, cooking and food, these past few days Pieter and I fed her foods that she haven't tried yet. She likes everything except soft cheeses, munster for example because she finds it too strong and stinky. She can bake a little but she's interested to learn more so I taught her few easy recipes that she can make once she returns to The Philppines. Everything she made all by herself. I just told her what to do and watched her while she's doing her thing.
Chocolate Chip Cookies

Banoffe Pie


Chicken and Mushroom Quiche.


She really did a good job right?

↧
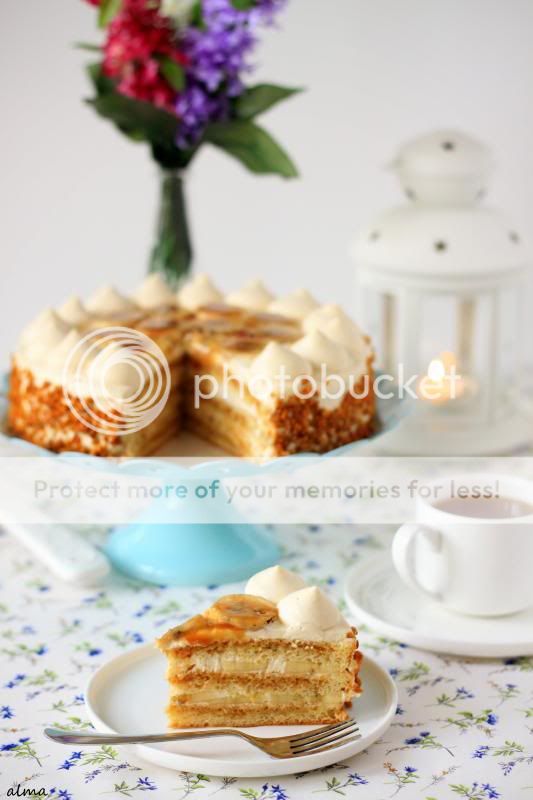
Banana Caramel Shortcake

This easy and super delicious cake recipe is from Pook of Dailydelicious. I am a big fan of her. She is very friendly and always answering everybody's questions regarding the recipe she posted.
My husband hates banana but he super loved this cake. My sister enjoyed it as well. I just made few adjustments though, instead of chiffon cake as the original recipe calls for, I made my favorite sponge cake. I also lessen the quantity of caramel as I don't like too sweet. Perfect sweetness and the salty caramelized nuts add a nice different crunchy texture to it.
banana caramel shortcake - recipe adapted fromDailydelicious
sponge cake
150g eggs
100g sugar
90g cake flour
15g unsalted butter
1 tbsp milk
1/2 vanilla pod, scrape the seeds
6 medium size bananas, 4 for filling, 2 for topping
superfine sugar for making caramelised banana
basic caramel
caramel whipped cream
assemble
150g eggs
100g sugar
90g cake flour
15g unsalted butter
1 tbsp milk
1/2 vanilla pod, scrape the seeds
6 medium size bananas, 4 for filling, 2 for topping
superfine sugar for making caramelised banana
- Pre-heat the oven to 160C.
- Line the base and side of the baking pan with parchment paper.
- In a metal bowl beat eggs with hand mixer, add sugar at once and beat for 30 seconds. Placed it over the pan of hot water and beat on high speed for 1-2 minutes. If it's warm enough remove from hot water and continue beating.
- Add vanilla seeds.
- In a small glass bowl combine milk and butter then dip into warm water. Continue beating the eggs on high speed until the mixture is thick and pale and beaters leave a thin ribbon. Lower down the speed and beat the eggs evenly to set the texture.
- Sift in flour and fold gently with spatula. Pour the pre-heated milk and butter to the batter, fold gently.
- Once the batter become smooth, pour the batter into prepared baking pan, then drop the pan lightly on the counter to break big bubbles in the batter.
- Bake at 160C for 23 minutes.
- When it's done, drop the pan lightly to prevent shrinking. Invert the pan onto the wire rack and let cool completely.
basic caramel
200g sugar
2tbsp water
200ml whipping cream
1/4 tsp salt
- Combine the sugar and water in a heavy saucepan and stir well to mix.
- Put the cream and salt in a second small saucepan, stir to combine (or put in the microwave proved measuring cup).
- Place the first pan on medium heat and cook undisturbed until the sugar begins to melt and caramelize-you’ll see a few wisps of smoke coming out of the sugar.
- Reduce the heat to low and stir occasionally so that the sugar melts and caramelizes evenly. Remove it from the heat when the caramel is still very pale (the sugar will continue to darken off the heat). Slide the pan with the cream onto the burner. As soon as the cream has some bubbles around the edge, add it to the caramel at arm’s length, averting your face—the caramel will boil up and may splatter out of the pan.
- Pour the diluted caramel into a medium bowl and cool it to room temperature.
caramel whipped cream
75 g sugar
1/2 tsp water
2 cups whipping cream
1 tsp vanilla extract
- Combine the sugar and water in a heavy saucepan and stir well to mix.
- Put 1/4 cup of the cream in a second small saucepan.
- Place the first pan on medium heat and cook undisturbed until the sugar begins to melt and caramelise-you’ll see a few wisps of smoke coming out of the sugar.
- Reduce the heat to low and stir occasionally so that the sugar melts and caramelises evenly.
- Remove it from the heat when the caramel is still very pale (the sugar will continue to darken off the heat).
- Slide the pan with the cream onto the burner. As soon as the cream has some bubbles around the edge, add it to the caramel at arm’s length, averting your face—the caramel will boil up and may splatter out of the pan. Pour the diluted caramel into a medium bowl and cool it to room temperature.
- Stir in the remaining whipping cream and the vanilla and chill until you are ready to finish the cake.
assemble
- Whip the caramel whipped cream until soft peaks formed.
- Slice cake into 3 layers.
- Place 1 layer in the cake ring (it's easier to use cake ring ^^), drizzle with basic caramel sauce, then spread the caramel cream over the caramel sauce, place the banana slices on the caramel cream and spread the caramel cream on top. Place another layer on top and repeat the process, then finish with another layer of cake. Press slightly, and spread thin layer of caramel cream on top then refrigerate for 30 minutes.
- Remove cake ring and spread the rest of the caramel cream on top and side of the cake, refrigerate while you make the caramelised banana.
- Cut the bananas into small rounds, sprinkle the superfine sugar on top, then use blowtorch to burn the top and side of the banana slices.
- Decorate the cake with caramelised banana and drizzle caramel sauce on top, refrigerate until ready to serve.


↧
↧
Japanese Cotton Cheesecake

Japanese cotton cheesecake: soft, light, fluffy and odd shape lol. First time I made this so obviously it wasn't perfect, but despite the odd shape I am really happy with the super fine texture (no big air bubbles) oh speaking of air bubbles I suddenly remember my very first Kasutera haha I must redo it. Anyway next time I will make this again I will make sure I won't over beat the egg whites and I am also thinking of adding flavor like coffee, lemon or vanilla. My sister liked it but according to her there is nothing special about this cake...its too plain.

japanese cheesecake - recipe adapted from The Little Teochew
140g fine granulated sugar
6 egg whites
6 egg yolks
1/4 tsp cream of tartar
50g butter
250g cream cheese
100ml fresh milk
60g cake flour
20g corn flour
1/4 tsp salt
- Preheat the oven at 160°C. Melt cream cheese, butter and milk over a double boiler. Cool the mixture. Fold in the flour, the cornflour, salt, egg yolks and mix well.
- Whisk egg whites with cream of tartar until foamy. Add in the sugar and whisk until soft peaks form.
- Add the egg whites to the cheese mixture to and fold well. Pour into a 8-inch round springform cake pan or removable-bottom cake pan (lightly grease and line the bottom and sides of the pan with greaseproof baking paper or parchment paper). Wrap the base of your cake tin with aluminium foil, to prevent seepage.
- Bake cheesecake in a water bath for 1 hour 10 mins or until set and golden brown at 160°C.
- Leave to cool in oven with door ajar, about 30mins to 1 hour. Sudden changes in temperature may cause the cake to cool too quickly and collapse.

Almost Spring!♥

She's enjoying the weather.


↧
Mocha Checkered Cake with Cream Cheese Frosting


coffee sponge - 8 inch
3 eggs
100g sugar90g cake flour
15g unsalted butter
1 tbsp milk
1 tbsp instant espresso
- Line the bottom and sides of an 8 inch baking pan.
- In a metal bowl beat eggs with hand mixer, add sugar at once and beat for 30 seconds. Placed it over the pan of hot water and beat on high speed for 1-2 minutes. If it's warm enough remove from hot water and continue beating.
- In a small glass bowl combine milk, butter and instant espresso. Then dip into warm water. Continue beating the eggs on high speed until the mixture is thick and pale and beaters leave a thin ribbon. Lower down the speed and beat the eggs evenly to set the texture.
- Sift in flour and fold together with spatula. Pour the pre-heated milk, butter and espresso to the batter, fold gently.
- When the batter become glossy and smooth, pour the batter over the prepared pan, then drop the pan lightly on the counter to break big bubbles in the batter.
- Bake at 160C for 22 minutes.
- When it's done, drop the pan lightly to prevent shrinking. Invert the pan onto the wire rack and let cool completely.
chocolate sponge - 8 inch
100g sugar
50g cake flour
40g cocoa powder
15g unsalted butter
1 tbsp milk
- Line the bottom and sides of an 8 inch baking pan.
- In a metal bowl beat eggs with hand mixer, add sugar at once and beat for 30 seconds. Placed it over the pan of hot water and beat on high speed for 1-2 minutes. If it's warm enough remove from hot water and continue beating.
- In a small glass bowl combine milk, butter. Then dip into warm water. Continue beating the eggs on high speed until the mixture is thick and pale and beaters leave a thin ribbon. Lower down the speed and beat the eggs evenly to set the texture.
- Sift in flour and cocoa powder then fold together with spatula. Pour the pre-heated milk and butter to the batter, fold gently.
- When the batter become glossy and smooth, pour the batter over the prepared pan, then drop the pan lightly on the counter to break big bubbles in the batter.
- Bake at 160C for 22 minutes.
- When it's done, drop the pan lightly to prevent shrinking. Invert the pan onto the wire rack and let cool completely.
cream cheese frosting - enough to frost two layer cake
250g unsalted butter, softened
200g cream cheese, softened
2-3 tbsp coffee extract
sifted powdered sugar
1 tsp vanilla extract
*Note: most recipe calls for atleast 2 cups of powdered sugar when making frosting. But I only used 1/2 cup as I don't like too sweet. In my opinion the consistency and sweetness is fine even I only used 1/2 cup of powdered sugar. But it's a matter of taste, add more powdered sugar as you please.
- In a large bowl, beat butter and cream cheese with an electric mixer until smooth.
- Add in coffee extract and sifted powdered sugar (1/4 cup a time until you reach the sweetness you like) beat slowly with electric mixer set on low speed until smooth.
- Add in vanilla and beat until creamy.
assemble
- Slice each cake into 2 layers. (I only used one layer each as its hard to finish if the cake is tall and the frosting is rich.)
- Cut each layer into 3 to 4 rings.
- Using frosting paste the rings together, alternating the flavours. Spread frosting evenly on top then repeat the second layer.
- Do a crumb coating with the frosting on cake, put in the fridge for 10 mins.
- After 10 minutes remove from the fridge and do a full frosting on cake.
- Decorate as desired.
- Chill before serving.

She did the crumb coating.

↧
Keukenhof 2014
Spring!!! It's Tulip time. Last Saturday Pieter and I took my sister and Coco to Keukenhof.
Keukenhof also known as the Garden of Europe, is the world's largest flower garden. It is situated near Lisse, The Netherlands. According to the official website for the Keukenhof Park, approximately 7 million flower bulbs are planted annually in the park, which covers an area of 32 hectares.
Keukenhof is located in South Holland in the small town of Lisse, south of Haarlem and southwest of Amsterdam. It is accessible by bus from the train stations of Haarlem, Leiden and Schiphol. It is located in an area called the "Dune and Bulb Region".
Keukenhof is open annually from mid-March to mid-May. The best time to view the tulips is around mid-April, depending on the weather.
![]()
![]()
![]()
![]()
![]()
![]()
![]()
![]()
![]()
![]()
![]()
![]()
![]()
![]()
![]()
![]()
![]()
![]()
![]()
![]()
![]()
![]()
![]()
![]()
![]()
![]()
![]()
![]()
![]()
![]()
![]()
![]()
![]()
![]()
![]()
![]()
![]()
![]()
![]()
![]()
![]()
![]()
![]()
![]()
![]()
![]()
![]()


My sister and I.


History about Tulips.


Coco enjoyed sniffing and peeing on the flowers haha.


Aj, Pieter and Coco.


My boys.


Different types of tulips and hyacinths.


Pretty like hyacinth. ♥


This photo was taken on top of the windmill.


More tulips and flowers inside the big green house.


This is how tulips look like once they are open.


Souvenir

↧
Religieuse Au Cafe

Has anyone of you seen The Grand Budapest Hotel? It was already shown in the cinema here in The Netherlands but I choose to wait for the dvd/blu-ray to be release so I can watch it at the comfort of my own living room. What's with that movie and this post? Well, actually my original plan is to make Gustave's favorite treat Courtesan Au Chocolat, but to be honest when it comes to choux pastry I prefer just plain whipped cream or coffee filling. I get easily bored with chocolates.
choux pastry - recipe adapted from Laura Calder
3/4 cups water (I used milk)
85g butter
2 tsp sugar
3/4 cups flour
3 eggs, lightly beaten
pinch of salt
milk for glaze
3/4 cups water (I used milk)
85g butter
2 tsp sugar
3/4 cups flour
3 eggs, lightly beaten
pinch of salt
milk for glaze
- Heat the oven to 375 F/190 C.
- Put the water, salt, butter, and sugar in a roomy saucepan, bring to a boil. Remove from the heat and add the flour all at once, beating until it forms a ball and pulls away from the sides of the pan. Return the pan to the heat for a minute or two and beat to dry it out a little. (Removing moisture will allow the paste to absorb more egg, which will ultimately make the puffs lighter.)
- Remove the pan from the heat. Beat in the eggs, the equivalent of one at a time, until fully incorporated. (Do not try to add them at once because they can't be incorporated quickly enough, it makes a total mess, and furthermore you may not need all of them.) Mix until the batter is smooth and glossy. Spoon the dough into a piping bag.
- Mix a bit of milk into any remaining egg (if no egg left, use only milk). Have at the ready with a pastry brush for glazing. Transfer batter into a piping bag and pipe into desired shape. You will need to pipe an equal number of small and large circles on a non-stick baking sheet, leaving a good 2-inches/5 cm between them so they have room to expand.
- Brush the tops with the glaze and press any snouts down with a fingertip. Bake for 15 minutes then lower the heat to 180 C and bake for another 15 to 20 minutes or until the buns puffed and golden. Bigger buns need to be in the oven a bit longer.
- Remove the golden buns from the oven immediately and pierce them with a sharp knife or skewer to allow for the steam to escape. Cool on a wire rack. Please do not ask how many buns I made as I keep on popping them in my mouth haha.
coffee pastry cream
2 cups milk
1 vanilla bean, split lengthwise
6 egg yolks
1/2 cup sugar
2 tbsp coffee extract (less if you don't want strong)
1 vanilla bean, split lengthwise
6 egg yolks
1/2 cup sugar
2 tbsp coffee extract (less if you don't want strong)
pinch salt
1/3 cup flour
1/2 cup heavy cream, whipped
1/3 cup flour
1/2 cup heavy cream, whipped
- Put the milk in a saucepan. Scrape the vanilla seeds into the milk and throw in the pod. Bring just to a boil, remove from the heat, cover, and set aside to infuse for 10 to 15 minutes.
- Beat the yolks and sugar to pale thick ribbons. Gradually beat in the flour. Whisk the milk into the egg mixture in a thin stream. Add the coffee extract and bring to a boil over medium heat, stirring constantly until the mixture thickens.
- Strain and set aside to cool. Cover with cling film directly on top to prevent a skin from forming. When cool, fold in the whipped cream and transfer to a piping bag with a small tip nozzle.
1 1/2 cups icing sugar
4 tbsp water, more if needed
1/2 tsp coffee extract
- Put the icing sugar in a bowl. Mix together the water and coffee extract and stir it in to make a thin icing. Add more water if necessary.
assemble
- Transfer the pastry cream into a piping bag fitted with a small tip nozzle.
- Insert the nozzle into the hole in the bottom of the choux bun. Gently squeeze the piping bag and fill the cavity of the choux bun.
- Dip the top of the choux bun into the coffee glaze, tapping off any excess. Let them sit for a minute or two before piping the whipped cream on top of the large choux bun then gently place the smaller bun on top then decorate.
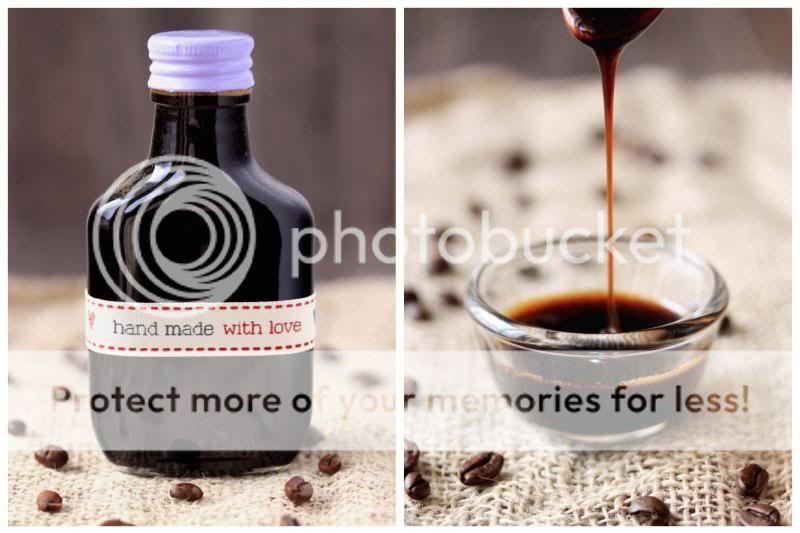
homemade coffee extract
1/2 cup hot espresso
1 tbsp water
1/2 cup sugar
- Combine the sugar and water in a small heavy-bottomed pot or pan.
- Place over medium-high heat and cook until the sugar begins to melt. Swirl the pan over the heat until the syrup darkens to a medium amber color. Careful not to burn it.
- Remove from the heat, and gently stir in 2 tablespoons of the hot espresso. Beware of splatters.
- Add the espresso, little by little, until it is all incorporated, stirring well between additions. Return to a boil then remove from the heat.


↧
↧
Strawberry Ombre Cake

I made this Strawberry Ombre Cake for my sister's birthday yesterday.


Vanilla sponge filled with macerated strawberries and strawberry cream cheese frosting.
She is really happy. In return she gave me the sweetest kiss and hug ever.
♥

Delicious!
↧
Brussels, Belgium For The 3rd Time
Last weekend we went on a day trip to Brussels, Belgium. This was my 3rd time and I'm still very much excited. We check out almost every chocolate shops, I had a hard time choosing what kinds of bonbon or praline I will purchase. Walk, walk, walk, choose, choose, choose...time has passed and we need to catch our train back to Holland, while I am sitting inside the train I suddenly realized that I only had callebaut couveture, few pieces of Darcis macarons, and the chocolates from Mathilde. Yes that's it! no bonbons, truffles or pralines. Shame on me!
So...here are a few Brussels photos. Enjoy and drool haha.

The Grand Place


Godiva

Chocolate covered strawberries

Le Funambule Waffles

The best waffle ever!


Messy to eat according to my sister. She had it with chocolate sauce, I like mine plain.

Giant Manneken Pis statue next to the waffle store.

Manneken Pis is a landmark small bronze sculpture in Brussels, depicting a naked little boy urinating into fountain's basin. It was designed by Hieronymus Duquesnoy the Elder and put in place in 1618.

Jeanneke Pis the counterpart of Manneken Pis.

Belgian Beers anyone?


Callebaut!!!!!


Neuhaus is a manufacturer of luxury Belgian chocolates, biscuits and ice cream. The company was foundein Brussels in 1857 by Jean Neuhaus, a Swiss immigrant, who opened the first store in the Koninklijke Sint-Hubertusgalerijen.
In 1912 his granson Jean Neuhaus II invented the chocolate bonbon or praline.
Today, Neuhaus has over 1,500 selling points in 50 countries. All Neuhaus products are still made in Vlezenbeek near Brussels, and are exported worldwide. In 2000 the company received the Royal Warrant of Appointment to the Belgian court.


6 kg Chocolate egg for 300 euro.


Blocks of nougat.

Easter theme window display.


Meringue


We bought the strawberry meringue. It was delicious!

Jean-Philippe Darcis is one of Belgium’s finest pastry chefs, confectioners and créateurs, all in one. He is renowned for his dedication to chocolate and his incredible take on macarons.


Delicious and super moist macarons.


Of course!


Too many chocolates to choose from.

La Cure Gourmande sell cookies, candies and chocolate as well.

Caramel yum!

Munching on free sample cookies haha. Actually she's not a cookie eater.

Beautiful tin cans.


Perfectly arranged cookies.


Looking for souvenirs.


2 1/2 months and she really gained weight. Now that's what you called a vacation.

We saw this shop while searching for Jeanneke Pis.


Bought few of these chocolates, no bonbons, truffles or pralines. For the second time Shame on me!


They also sell herbs and spices.

Salts

Preserves and mustards


Herbs

Flavored Liqueurs


Visit to Belgium is not complete without eating Belgian Fries and Waffles.

Inside the train going back to Holland. My sister bought chocolate gift boxes.
↧
Ladurée, Pierre Hermé and Sadaharu AOKI Paris, France
My sister is now back in The Philippines, but before she flew back we took her to Paris, France for a short vacation. Of course we are in Paris, will I ever forget macarons, pastries, breads and cakes?! NO WAY!
![:-D]()


I bought 6 pieces of macarons from Ladurée. I ditched the beautiful box as it will cost me more euro. Macaron cost €1,90 per pc.


This is the kind of window displays that attracts me.


Seriously if I didn't know Pierre Hermé and didn't see the macarons and chocolate on top of his name I would think this boutique sells expensive bags or shoes lol (well honestly his macarons and chocolates are expensive). Unlike Ladurée's cute pink and green pastel color, Pierre Hermé's boutique doesn't have colorful window displays.

Camera is not allowed inside the boutique. Good thing I managed to snap a few photos while the sales person was busy taking orders from the other customer. Macaron cost €2,10 per pc and to be honest I didn't like it because the shell was to soft and almost soggy and the filling was overly sweet. I'm glad I only bought 4 pieces.


Sadaharu AOKI's Japanese flavor macarons tasted great and it was the cheapest of the 3. Beautiful fusion of Japanese flavors and French style desserts.


Sadaharu AOKI at boutique LaFayette Gourmet.

Beautiful Art of Sadaharu Aoki.


We had a macaron tasting in our hotel room.
Ladurée: Marie-Antoinette, Rose, Salted Caramel, Chocolate Coconut Guimauve, Orange Blossom
was a little bit disappointed because the sales person gave me 2 pcs of salted caramel macarons. In short I only tried 5 flavors. I love the rose though.
Pierre Hermé: Montebello, Infiniment Chocolat Paineiras, Mogador, Miléna
Pierre Hermé: Montebello, Infiniment Chocolat Paineiras, Mogador, Miléna
My sister liked the Montebello. Mogador uhmmm...I find the passion fruit too sour.
Sadaharu AOKI: Sésame noir, Houjicha, Earl grey, Yuzu, Genmaicha, Violette, Wasabi, Matcha
Sadaharu AOKI: Sésame noir, Houjicha, Earl grey, Yuzu, Genmaicha, Violette, Wasabi, Matcha
I ordered mostly asian flavoured macarons. They all tasted great. Wasabi is my favorite.
Sliced cake: Matcha azuki Delicious!
In my opinion the best macarons I've eaten was from Ladurée.
↧
French Inspired Dollhouse Bakery
This dollhouse bakery was inspired by my Paris trip.


Will add more items in the middle.


Rub on sticker = Instant lace curtain
↧
↧
Lavender Dream

Another project completed! ♥
This cutie is a birthday gift for my mother in-law.

I made the bicycle as well.

The lavenders are made out of styrofoam beads.

Patience required when assembling a small item like this.


Yay! Finally clean table. Next week we will buy a glass cabinet to protect my dollhouses from collecting dust.

Working on rainbow macaron cake earrings. Obviously I have no baking or food photography plans haha. And oh I super love the lavender on my window sill.
↧
Polymer Earrings
I've started to sell the polymer earrings I made in Marktplaats. Marktplaats is an online store where you can sell your brand new or second hand items, basically it's like ebay but Dutch haha.

Size: cupcake 1 cm
Materials: polymer clay, hypoallergenic

Sushi: €10.00
Size: sushi 1.8 cm
Materials: polymer clay, hypoallergenic


Hup Holland cupcake €5.00
Size: cupcake 1 cm
Materials: polymer clay, hypoallergenic

Dutch team is doing great, same as my cupcake earrings :-D
ps, next week I will post a recipe.
↧
Salted Caramels

I finally used the French salted butter that I bought in Paris for this candies and I'm telling you this is the best salted caramel candies ever.
I got the recipe from Inspired Taste. But as what I have said, I used salted butter and I also added a teaspoon of vanilla extract to the cream and butter mixture.


↧
I Bake, I Sculpt and I Shoot...haha

Strawberry and Pistachio Tartlets. ![]()

Sweet almond pastry and pistachio mousseline cream recipes from Ladurée’s “Sucré: The Recipes"

Making miniature Ispahan and Pistachio macarons

Mini photoshoot :-D

Voilà!
↧
↧
More Pages to Explore .....


